If you’re a Xamarin.Forms developer, it’s likely you already know about the two great talks that Jason Smith did at Evolve this year (2016). Both of the talks were on performance in Xamarin.Forms and they were outstanding because we got a truckload of performance tips that we’ve never had previously. If you’ve watched them once we would recommend you also consider watching them again, there’s alot of content and you’ll learn something new. This insight into the Xamarin.Forms performance and the layout system has been a key part of us building performant apps in Xamarin.Forms at XAM Consulting.
But we wanted more, we wanted more speed and more performance, we want native performance. The tips we got were great, but we wanted to understand why these tips existed because if we understand the system we can use that understanding to develop our own tips and techniques for Xamarin.Forms performance.
One of the points that Jason makes is about the Xamarin.Forms Grid, the suggestion is that we should avoid using the ‘Auto’ setting for columns and rows. Why is this? Well it turns out that if a view inside a Auto column changes size (or generally does anything to invalid measure) the grid will be doing a full layout of all children, well not only the grid but the Grid’s parent and parent after that.
If you watch both of the talks, it’s clear the root of performance in Xamarin.Forms is in the layout system, so let’s look into this Layout System. Now that Xamarin.Forms is open source we can use the code a understand the layout system.
The layout system is broken up into two parts/cycles, 1) the invalidation cycle 2) the layout cycle.
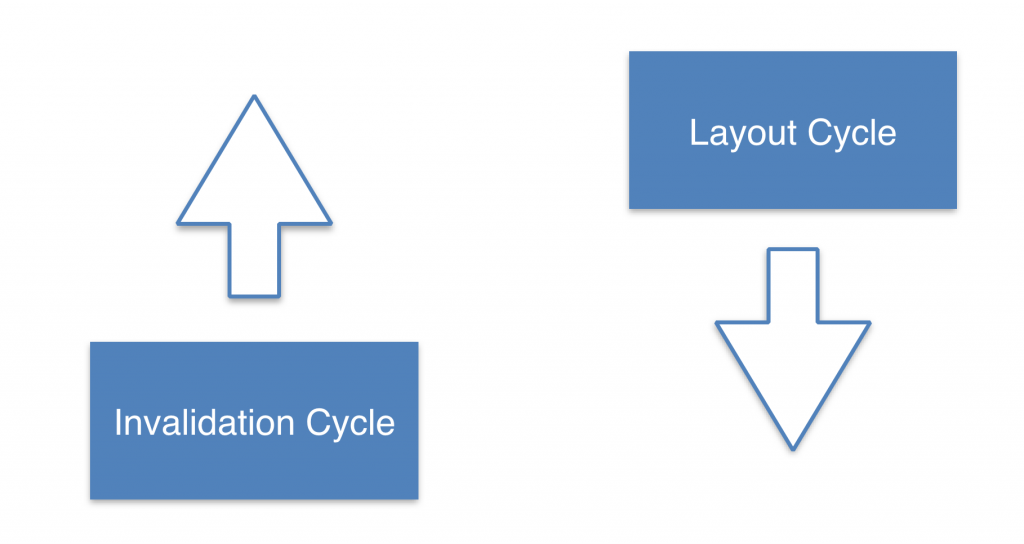
Invalidation Cycle
To understand the invalidation cycle let’s take a look at the Xamarin.Forms layout code.
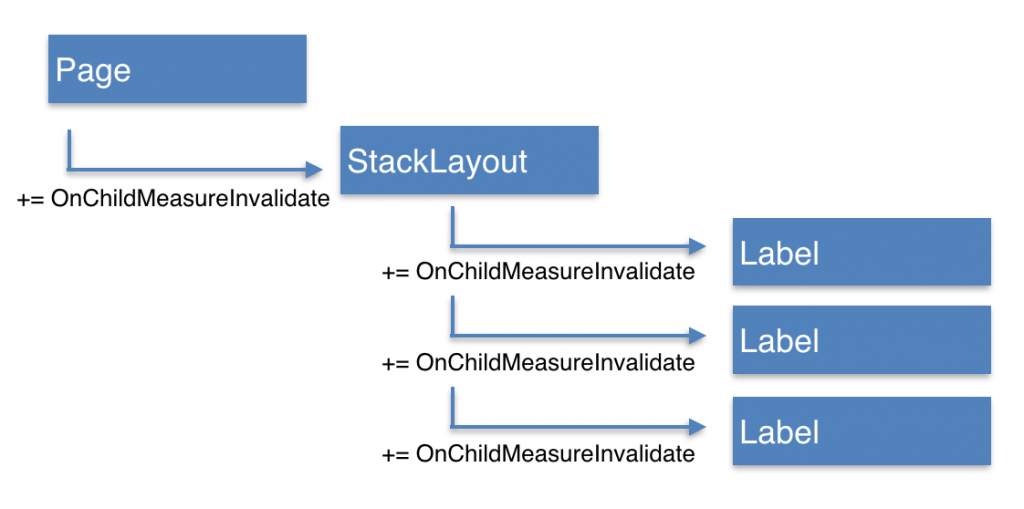
As we can see in this code below each VisualElement.cs has a event MeasureInvalidated, VisualElement is the base class of Layouts, Views and Pages.

Then each time a child is added to a Page or Layout, the parent attaches the MeasureInvalidated event of the child.
![]()
As we can see below the OnChildMeasureInvalidated event handler (for the children) then calls the MeasureInvalidated event, because the parent of that View is subscribed to the MeasureInvalidated even the parents OnChildMeasureInvalidated method is called. It’s important to note there’s conditional logic involved, the event will not always be called.
![]()
…Conditional Logic…
![]()
So here’s an example of what it looks like, with the events.
Here’s what happens when a child view becomes invalidated. As you can see the events bubble to the top.

That’s the invalidation cycle.
Layout Cycle
Let’s take a look at the layout cycle, the layout cycle happens in two cases:
1) When a layout is done for the first time, eg. when a page is first displayed.
2) After the invalidation cycle
As you can see in the image below, during the first part of the layout cycle measure is called on the child. It’s important to note that for the most part measure is called on all children and in many cases it’s called multiple times. After the children have been measured then layout is called on all children.
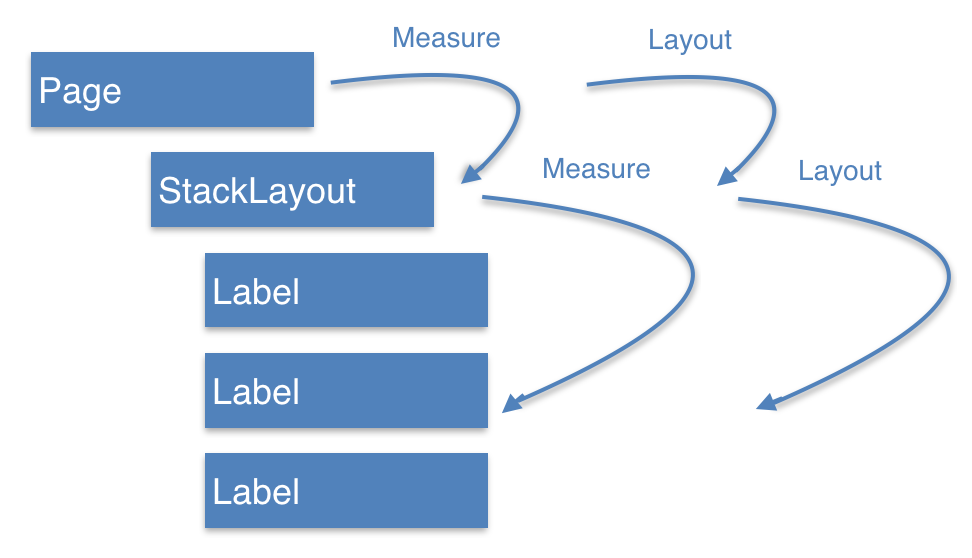
So here’s how the full layout looks.
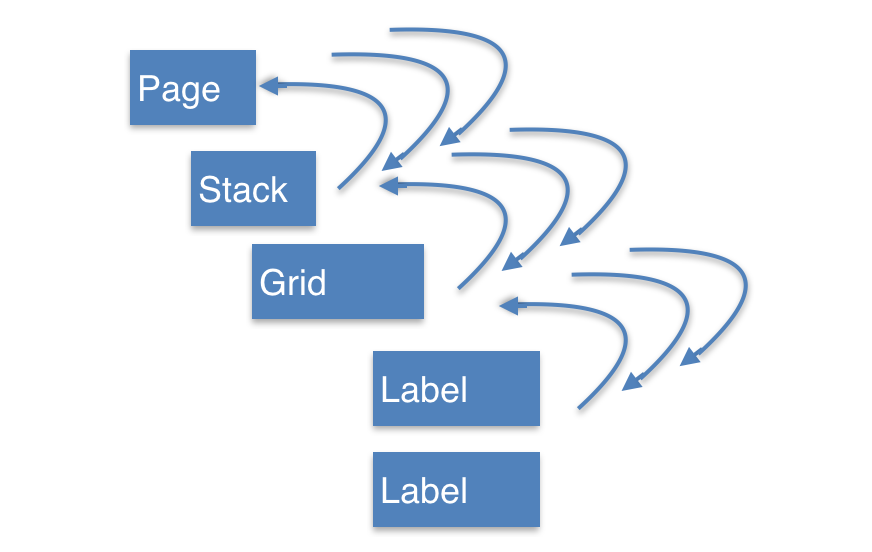
You might be thinking why do I care about this? Well because we can hack it. It’s possible to short circuit the invalidation cycle at an early stage, as per the image below.
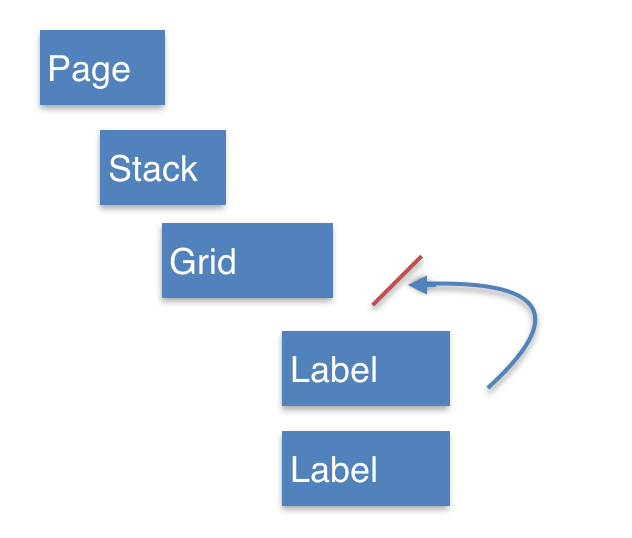
Let’s take a look at how we can test this. In order to test this I’ve created a page with a few labels and a single label that’s, updated on a timer 20 times. I’ve also linked up my Xamarin.Forms app into the Forms code base and added performance metrics to the methods inside Forms.
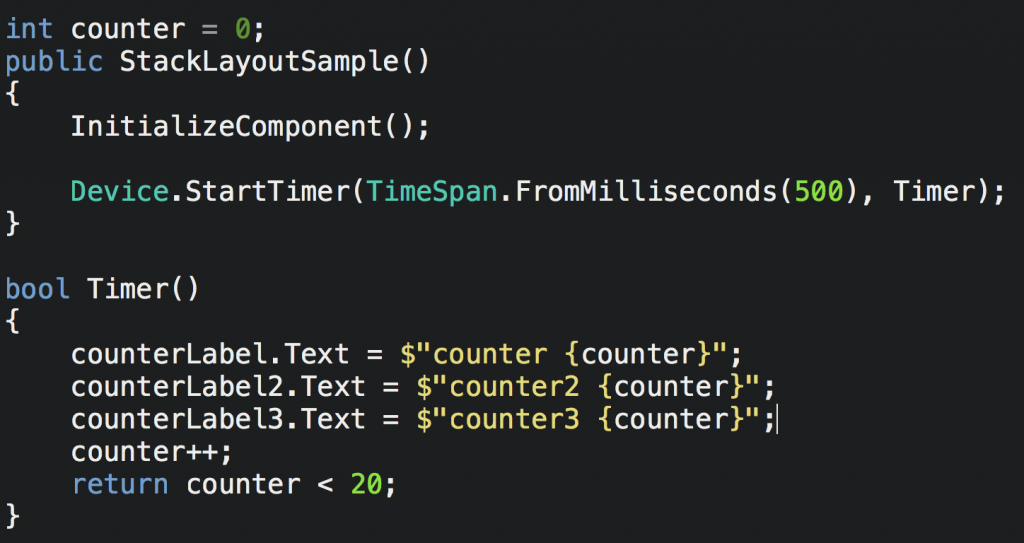
Let’s first take a look at the results of a StackLayout as per below. 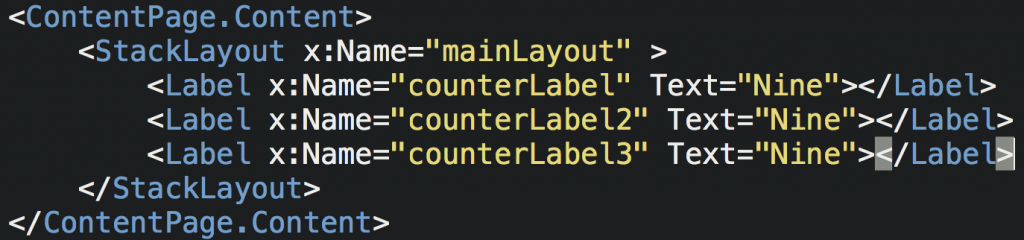
The results show that LayoutChildIntoBoundingRegion is called 243 times, every time the text of the label is changed a full layout cycle happens.

Let’s try the same with a Grid, as per below.
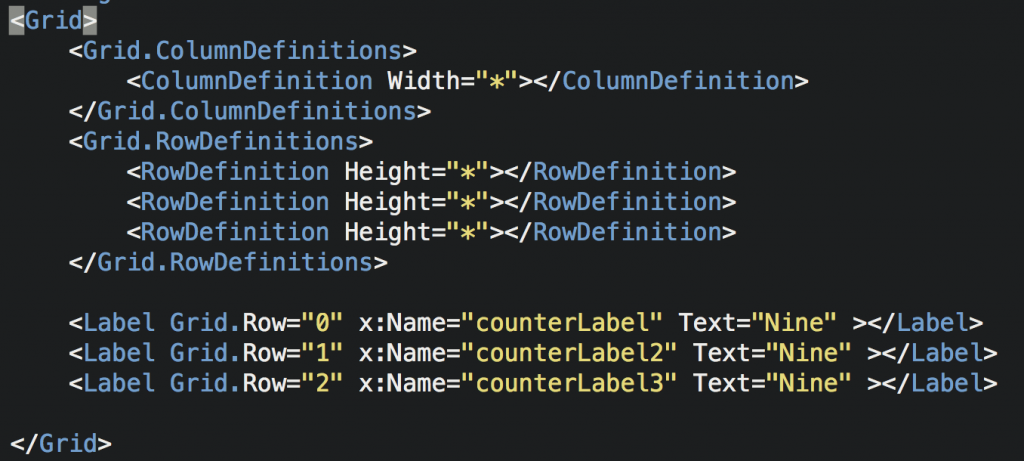
The results show that LayoutChildIntoBoundingRegion is called 6 times, it’s only called the first time the view is shown.

Let’s try the same Grid but using a ‘Auto’ for a row.
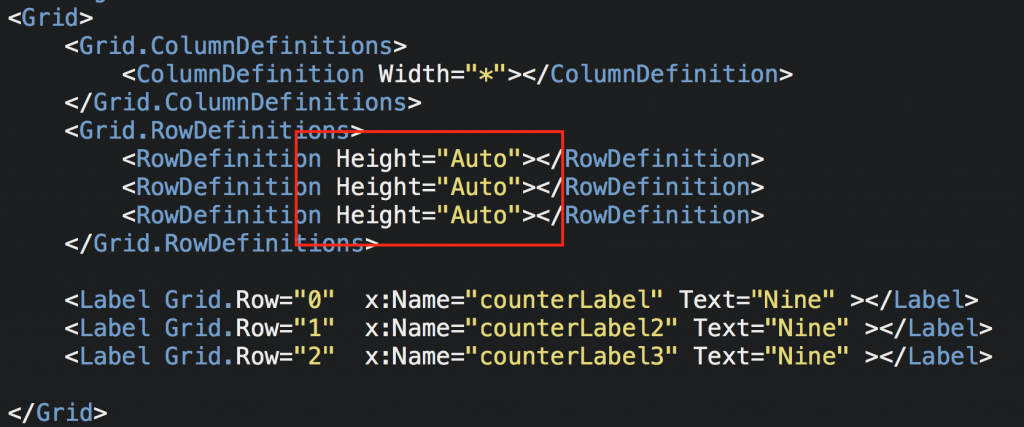
The result is back up to 243 times and the full layout is happening every time the label text is changed.
Ok, now let’s put back the Grid to using stars but I also want to try something different. I want to have children of the grid dynamically change size, so let’s test with a BoxView that changes width.

NB – In order for me to change the Width of the Box I need to change the HorizontalOptions on the BoxView from Fill to Start.
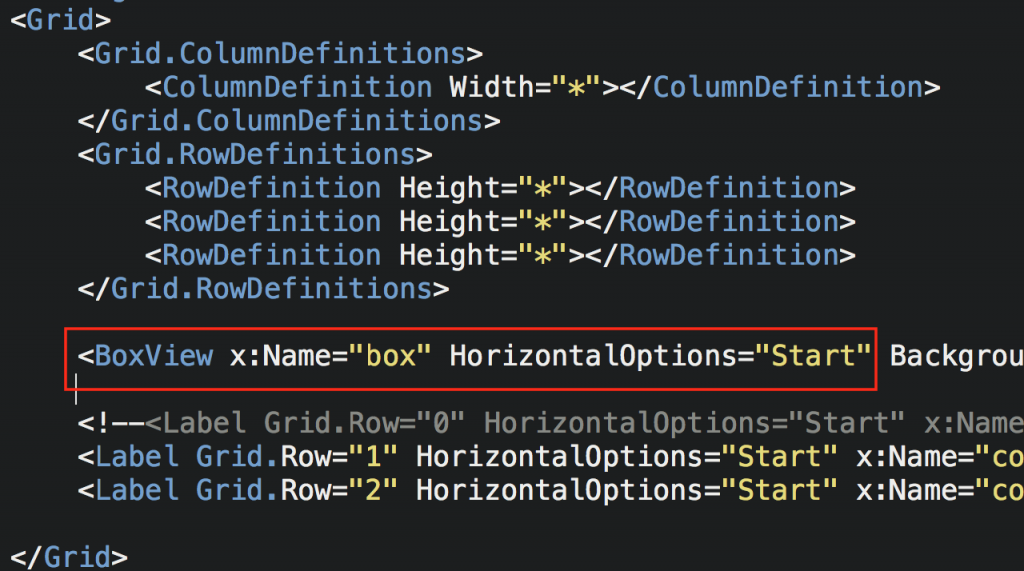
Even though we’ve changed the Height back to a star the result is still 243 and the full layout is happening everytime the label text is changed. It seems that when we change the HorizontalOptions of a child we also change change the invalidation cycle behaviour.
Ok, so I changed the BoxView back to Fill the BoxView will not change dynamically. Let’s try something different, lets put the BoxView inside a ContentView.
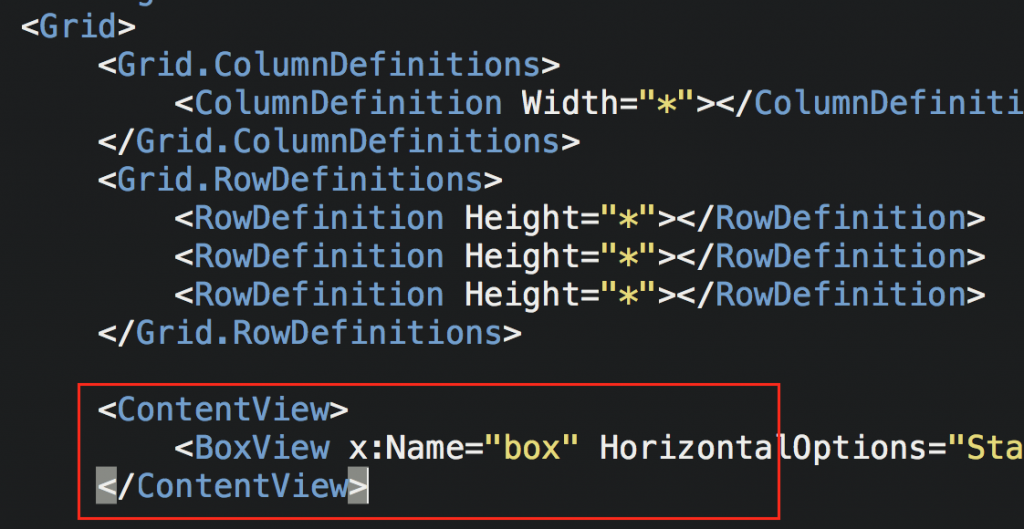
It’s back down again, great so we still get our children changing dynamically and we also short circuit the layout system.
Conclusions
- A child of a stacklayout will always cause a full layout cycle, there’s no way a StackLayout can short circuit this cycle.
- A child of a Grid with that’s inside rows and columns with static or star widths AND the LayoutOptions are set to Fill, are fully constrained which means that the invalidation cycle will be stopped at that child view.
- In order to have children of a Grid change layout dynamically they need to be a child of another View which is fully constrained. (As per the Grid sample).
After taking a look at the Xamarin.Forms code base I can see this is the line that does the short circuit. It seems that a view.Constraint needs to be the value of LayoutConstraint.Fixed for this short circuit to occur. I did further research into this and found the only time we can short circuit the invalidation cycle is in the cases proven above.
UPDATE – Originally in this blog post I mentioned that the above cases are the only way to short circuit the invalidation cycle, this is not entirely true as the AbsoluteLayout can be used to short circuit the invalidation cycle. I will put together some more research for this for another post.


This is great. Can you share how you attached your app to the XF source code so we could do the same?
Also, I remember reading somewhere that we should not wrap Labels in a ContentView. Can you shed light on that since ContentView seems to be constrainted?
Mark, ContentView will always be constrained inside the Grid under these circumstances, it will not dynamically change size if the text does.
That LayoutConstraint was nice, to bad it is internal only.
However you could easy hack something out with my code example here: https://gist.github.com/oddbear/e3eda01e0f19182e03fa3e665a79a101
This will be quite similar to Layout.
Just wondering, could you please post your sample project for what you described here? Trying to investigate this layout cycle but I couldn’t achieve results you are showing in here.
Cheers
Yes, I will do sometime soon.